Showing posts with label Rumah Manis. Show all posts

Saturday, June 3, 2017

Sour Cherry Preserve


Is June, it's time to pick sour cherry from the farm .  I've been lucky enough to find this family farm 1 hour drive distance from our home - in a matter of week, sour cherry will be gone especially only 1 place near by has this tree on their farm.


We were serious cherry picker, you know.  Within 2 hours we  picked so many cherries, blueberries also (surprise surprise) mulberries to bring home , as I always have plan on my head what should I do with this beauty!  Torshi and Moraba are the option, since our own Iranian - Indonesian family loves eat fresh bread with moraba.
 
Here is the simple recipe I'd like to share, hope you are lucky enough to get sour cherry on your hand otherwise regular cherry will work fine to, only reduce of sugar .
 
 
Sour Cherries Preserve - Moraba-ye- Albaloo
Ingredients :
11/2 lbs sour cherry
1 cup sugar
 
1 tbsp. rose water (optional)
 
Directions :
Wash, dry and remove pits from sour cherries
Add sugar to sour cherries and let them sit there for a couple of hours.
Place fruit and juices in a pot and bring to a simmer. Remove extra foam. Simmer for about an hour until the juices turn into syrup. Sometimes sour cherries have a lot of juice. You have two options if you are left with too much syrup. One option is to remove the actual fruit from the pot and reduce the remaining syrup. The other option is to save the syrup and and add ice and water for refreshing drink during hot summer day - all natural ingredients l !!


Pickled Sour Cherries - Torshi-ye-Albaloo
Ingredients :
1 lbs sour cherry
400ml white vinegar
2 tsp salt
100 gr sugar
2 fresh thyme sprigs
10 whole peppercorns
 
Directions :
wash and sort through the cherry carefully, discarding the leaves and trimming the stalk .
Place the vinegar and generous about 200ml water in a pan, add salt bring to boil than add rhe sugar, turn off the heat down , simmer about 10 minutes until sugar dissolve
Divide the cherries , thyme, between sterilized jar. Pour the pickling liquid over the top, allow to coll and seal. Allow at least 1 week before you trying your torshi (honestly this is the hard part)

Thursday, February 23, 2017

Traditional Napa Cabbage Kimchi (Vegetarian Type)


I love making pickles, any kind..  and this is a very first time I make kimchi (Korean Style Pickle) . Actually is easy to just visit Korean Store near by and get one, but cooking is in my DNA - I see many videos and recipes before I make my own kimchi.  The recipe comes from Maangchi, owner of Korean cooking website.

I slightly copy the recipe with a little adjustment since I choose to make vegan style, which I skip using squid or shrimp - anyway, please visit her youtube video or her website to get a clear tutorial HERE

This is a big batch recipe, I just make a half portion of recipe since I want to find out if this recipe work or not, which no surprise work very well.


Traditional Napa Cabbage Kimchi (Vegetarian Style)
Recipe : Maangchi

Ingredients :
Makes about 8 pounds (3.6 kg) of Kimchi
For salting cabbage:

6 pounds napa cabbage (3 to 4 heads of medium napa cabbage)

½ cup Kosher salt

For making porridge:

2 cups water

2 tablespoons sweet rice flour (glutinous rice flour)

2 tablespoons brown sugar

Vegetables:

2 cups radish matchsticks

1 cup carrot matchsticks

7 to 8 green onions, chopped

1 cup chopped asian chives (substitute with 3 green onions, chopped)

Seasonings and spices:

½ cup garlic cloves (24 garlic cloves), minced

2 teaspoon ginger, minced

1 medium onion, minced

½ cup fish sauce

2 cups hot pepper flakes


Directions
Prepare and salt the cabbage:

If the cabbage cores stick out too much, trim them off.

To split a cabbage in half without shredding the densely packed leaves inside, first cut a short slit in the base of the cabbage, enough to get a grip on either half, and then gently pull the halves apart so the cabbage splits open.

Cut a slit through the core of each half, 2 inches above the stem. You want the cabbage leaves to be loose but still attached to the core

Dunk the halves in a large basin of water to get them wet. Sprinkle the salt between the leaves by lifting up every leaf and getting salt in there. Use more salt closer to the stems, where the leaves are thicker

Let the cabbages rest for 2 hours. Turn over every 30 minutes, so they get well salted. From time to time you can ladle some of the salty water from the bottom of the basin over top of the cabbages if you want to

After 2 hours, wash the cabbage halves a few times under cold running water. Giving them a good washing, to remove the salt and any dirt. As you wash, split the halves into quarters along the slits you cut into earlier. Cut off the cores, and put them in a strainer over a basin so they can drain well.

While the cabbage is salting for 2 hours, and in between the times you’re turning it over, you can make the porridge:

Combine the water and the sweet rice flour in a small pot. Mix well with a wooden spoon and let it cook over medium heat for about 10 minutes until it starts to bubble. Add the sugar and cook 1 more minute, stirring. Remove from the heat and let it cool off completely.

Pour cooled porridge into a large mixing bowl. Add garlic, ginger, onion, fish sauce, and hot pepper flakes. Mix well with the wooden spoon until the mixture turns into a thin paste

Add the radish, carrot, and green onion, plus the Asian chives (or more green onions) and the water dropwort if you’re using them. Mix well

Make kimchi:

Spread some kimchi paste on each cabbage leaf. When every leaf in a quarter is covered with paste, wrap it around itself into a small packet, and put into your jar, plastic container 

On fermentation:

The kimchi will start fermenting a day or two at room temperature, depending on the temperature and humidity of your room. The warmer and more humid it is, the faster the kimchi will ferment. Once it starts to ferment it will smell and taste sour, and pressing on the top of the kimchi with a spoon will release bubbles from beneath.

Once it starts to fermented, store in the refrigerator to use as needed. This slows down the fermentation process, which will make the kimchi more and more sour as time goes on.

Wednesday, February 15, 2017

Pandan Ogura Cake


I've been itch to try pandan ogura cake since I saw some fellow blogger post about this cake.  Pandan Ogura cake is kind of similar to chiffon cake which the cake texture is kind of airy , the different is baking method - as we called water bath method, which there is steam needed to help cake baked.  And also add a natural food color, from pandan extract.   You will find the pandan leaves very easy , mostly at Asian market. 
 
My husband like this cake, even thou he prefer butter cake which is more 'stiff' than 'airy' type of cake.  And my daughter ? she was not impress by this cake  Hahahaha... I think because she not fan of the color thou, she said,  she will like if I using chocolate powder instead ...
 
I combine several recipe that I found through online, and this is recipe that I already fix here and there for my taste and work well for me.  Let's give a try


Pandan Ogura Cake

5 eggs (seperated while is cold)

1 whole egg

1/4 salt
 
80 gr castor sugar

60 gr vegetable oil

70gr pandan juice - you can use pandan extract as much as 1 tsp

20gr coconut milk

75gr all purpose flour

1/4 tsp cream of tar tar or subtitute with 1 tsp lemon juice

 
Directions :

Prepare 8" square or round pan - grease the pan, dusting with a little flour and cover with parchment paper .

Another square pan quite bigger than 8" for water bath method.

Is important to check your oven correctly, I set my oven 300F for bake this cake.

Beat 5 egg yolk, 1 whole egg, salt , vegetable oil , pandan juice and coconut milk with hand whisker until fluffy. Shift in flour, then mix it until well combine. Set aside

Beat egg white and lemon juice or cream of tar tar with mixer about 2 minute, add castor sugar little by little , continuesly mix until firm peak form, with rubber spatula add this white meringue to the yolk batter, fold the batter until nice smooth batter is created.

Pour the mixture into prepared pan, tap 2 times so the air will pops up .

Put the pan into the larger pan , slide to the oven and carefully filled the outside pan with hot water, about 1/3 batter pan. Bake for aboout 50minute.

Once baked, remove from the pan immediately, to avoid cake become shrink . inverted on a rack .. take the parchment paper , cool completely before slicing

Thursday, February 9, 2017

Persian Dolmeh


I love dolmeh, such an easy finger food and you won't stop eating just for one. The other day, I decide to use a ground chicken .. since I wonder if the taste will as good as using ground beef. Actually I like the taste.  I grind my own chicken, so I have the best taste of chicken rather than buy the ready one from the store.

Here is the recipe, is pretty much easy to make but I suggest you to cook the filling day ahead and keep in the refrigerator until you ready to use it so you won't end up stay in the kitchen too long, well the story is different if you like cooking and spend time there :) but I just thinking about practical thing.


Persian Dolmeh
Ingredients 
1 jar of grape leaves or if you can find the fresh one , you might need about 50 leaves
1 cup rice
1 medium onion
1/2 cup yellow split peas 
1/3 cup lemon juice or vinegar
2-3 tablespoons sugar
250-500 grams ground chicken / ground beef / ground turkey or skip for vegetarian style
1 cup for every fresh herbs such : parsley, cilantro, green onion, dill,
1 tbsp dried taragon 
salt, pepper
turmeric
oil
water

Directions:

Chop up the onion and fry it in a pan. Add the meat once the onion is golden in color and fry the meat. Add about half a cup of water and allow the meat to cook. You will add salt, pepper, and turmeric to the meat as well. Allow the meat to cook for at least 20. Once the meat is cooked set it aside and allow it to cool.

Heat up water in a pot and boil the yellow split peas for approximately 15 minutes. Then drain and set them aside to cool.

Heat up water in a pot and bring the rice to a boil. Drain the rice and set aside to cool.

Clean any fresh herbs and chop them up slightly using a food processor

Mix all these ingredients together in a bowl, add salt and pepper for taste.

If you are using fresh Grape Leaves you will need to boil them in water for a bit so that they soft. If using Grape Leaves in a jar bought from the store make sure you wash them well so they have no preservatives left on them (it will ruin the flavor if left on the leaves).   For this step I did a day ahead so the leaves won't be too wet when I use it.

Take the leaves one at a time and lay them on a surface or cutting board. Take some of the mixture and place it on the leaf and then begin wrapping the leaf.

add oil to the pot you plan on using to cook the Dolmeh in. Take a few leaves that aren’t wrapped and place them on the bottom of the pot. Take all the prepared Dolmeh’s and place them on the bottom of the pot leaving no spaces.

Meanwhile , take the 1/3 cup of lemon juice (or vinegar) and add the sugar to it. Add about a cup of water to the juice/sugar and stir everything together. Once the sugar has dissolved pour the contents all over the Dolmeh’s in the pot.

Place a plate (or something else thats heavy) over the Dolmeh’s to make sure they dont move around. Turn the burner on to medium-low heat and place the lid on top of the pot. Allow the Stuffed Grape Leaves to cook for 30-45 minutes.

Allow to cool before serving, preferably in the fridge overnight

Monday, February 6, 2017

Matcha Macaron ..


It has been a while not baking macaron, a year I believe, until this week I feel like to bake this cute cookies again. And what happened ? I failed , I thought I already lost my 'magic power' , I waste my precious matcha powder! Not only the shell didn't have 'feet' but just flat like a coin..    oh this can't be right !!!     The next day, read the recipe carefully , pay attention to my oven heat , exactly 50 stroke mixing the batter, and look at my macaron ....    I did it....  yaaay..


For the macarons shells:
90 gr egg whites (about 3)
30 gr granulated sugar
200 gr powdered sugar
110 gr almonds

2 tsp matcha powder

For the whites: the day before (24hrs), separate your eggs and store the whites at room temperature in a covered container. If you want to use 48hrs (or more) egg whites, you can store them in the fridge.


In a stand mixer fitted with the whisk attachment, whip the egg whites to a foam, gradually add the sugar until you obtain a glossy meringue. Do not over beat your meringue or it will be too dry. Combine the almonds and powdered sugar in a food processor and give them a good pulse until the nuts are finely ground. Add them to the meringue, give it a quick fold to break some of the air and then fold the mass carefully until you obtain a batter that flows like lava or a thick ribbon. Add the matcha powder. Give quick strokes at first to break the mass and slow down. The whole process should not take more than 50 strokes. Test a small amount on a plate: if the tops flattens on its own you are good to go. If there is a small beak, give the batter a couple of turns.


Fill a pastry bag fitted with a plain tip with the batter and pipe small rounds (1.5 inches in diameter) onto parchment paper or silicone mats lined baking sheets. 


Preheat the oven to 280F. Let the macarons sit out for 30 minutes to an hour to harden their shells a bit and bake for 15 to 20 minutes, depending on their size. Let cool. If you have trouble removing the shells, pour a couple of drops of water under the parchment paper while the sheet is still a bit warm and the macarons will lift up more easily do to the moisture. Don't let them sit there in it too long or they will become soggy. Once baked and if you are not using them right away, store them in an airtight container out of the fridge for a couple of days or in the freezer. 

To fill: pipe or spoon about 1 big tablespoon of chocolate ganache in the center of one shell and top with another one.

Chocolate Ganache 
Ingredients :
  • 1 1/2 cups (12 fluid ounces or 360 ml ) heavy cream
  • 1 lb (454 grams) semisweet or bittersweet dark chocolate
    1. In a heavy saucepan, boil heavy cream. Turn off the heat. Add chopped chocolate pieces and let it rest until melted. Use a rubber spatula to stir the mixture until all the pieces are melted.
    2. Pour it into a room-temperature bowl and cover with plastic wrap. Refrigerate the ganache until firm.
    1. Note: For White Chocolate Ganache, substitute white chocolate for semisweet or bittersweet dark chocolate.


Saturday, February 4, 2017

Sewing Tova Dress


I've been sewing many Tova dress lately , I saw tova pattern about year ago but just have gut to order the pattern a couple months before.  I had doubt in my mind, if I just waste my money or I will like the pattern .. and after first attempt , and check Tova sew along on Kerry blog so many times, finally I know I am in the right path.   Even my daughter has faith in me, she asked me to make same tova dress (I can say Tova Top) like mine.    For her case, I used Small Size and adjusting in several places, I cut little bit small and cut arm hole about 1/4 inch bigger , and voila.. its fit.

Here is some of tova top I made , and I still have 1 more fabric to cut for myself .. so what do you think ?   

2 gingham tova for my daughter

 2 tova top for me

Friday, February 3, 2017

Nastar Cookies / Pineapple Tart Cookies


2 times in a week I baked this cookies, first of all because the pineapple in store near by was crazy cheap .  Without hesitation I bought 5 of them, peel, granted and made pineapple jam since everyone loves eat bread with pineapple jam over the weekend.  Off course, I used some of them for my pineapple tart cookies .


Wanna try to make your own ? I adapted recipe from my blogger buddy, Annita..  thanks for the recipe dear ..


Nastar Cookies
350 gram unsalted butter, room temperature
100 gram sweet condensed milk
2 egg yolks
510 gram all purpose flour
Egg wash : 1 egg yolk + 2 tsp honey + 1 teaspoon milk

Direction :

Beat together butter and condensed milk until light and fluffy. Add egg, one and a time, beat until well mixed. Slowly add all purpose flour in batches into the mixture, beat until the dough becomes smooth, but not sticky. I find it easier if I just use my hand to incorporate the last batch of flour into the dough.

Scoop 10 gram of dough and make a round ball. Repeat until dough is used up.

Prepare 2 baking sheets, each lined with a parchment paper.

Flatten each dough, place the pineapple jam filling at the center, gather the edges of the dough and wrap the filling with the dough. Roll into a round ball, then place on prepared baking sheet. Repeat for the rest of dough and jam filling.

Mix egg yolk, honey and milk together to make the egg wash. Brush the top of cookies with egg wash.

Preheat oven to 300 Fahrenheit. Bake the cookies for 30-40 minutes until golden brown.
Let the cookies cool completely before storing them in nice looking jars.

Pineapple jam
1 ripe pineapple, flesh only
1 cinnamon stick (optional)
3 cloves (optional)
200 gram brown sugar, or to taste

Directions :
In a food processor/blender, puree pineapple. Transfer pineapple puree into a heavy bottom pot along with cinnamon stick, cloves, brown sugar .Turn on heat to medium and cook until boiling,

Reduce heat to a simmer and continue cooking until the jam is really thick. Add more sugar if needed. Near the end, be sure to stir and scrap frequently to prevent burning.

Transfer jam to a mixing bowl to cool. Keep in refrigerator . Make this pineapple jam ahead of time, and let in room temperature before you using it

Friday, December 16, 2016

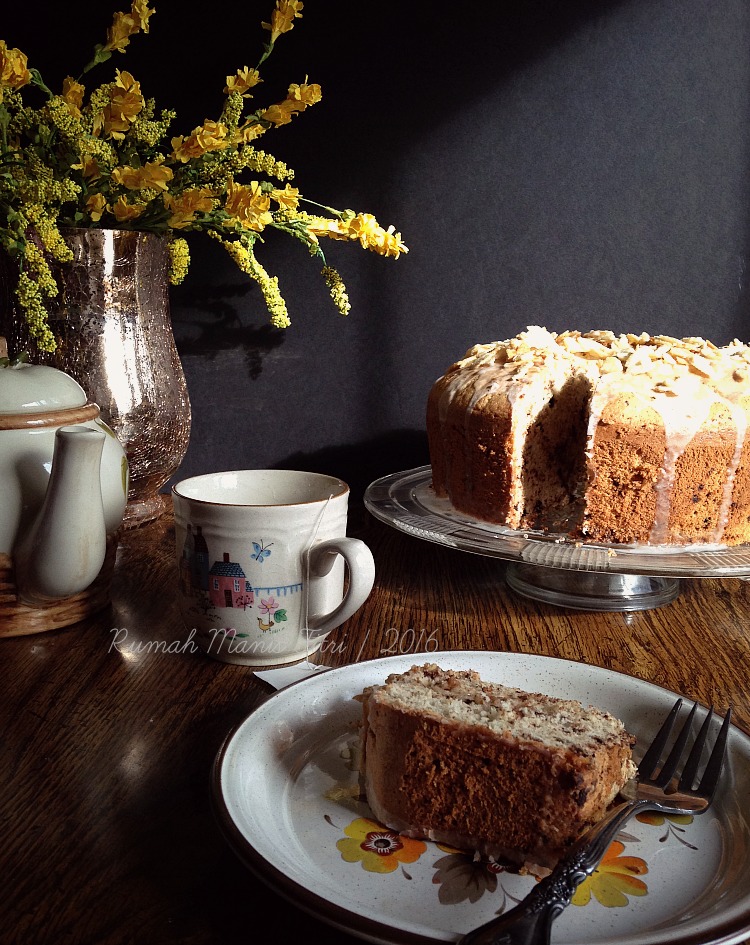
Chocolate Confetti Chiffon Cake with Almond Crunch'


Is December, this momma turn 47 young yesterday , nothing fancy happen since I don't like to celebrate birthday especially my own but I baked cake for sure, not because of birthday's girl need cake but I have 2 cookies monsters at home who keep looking what under cake dome .. any time !!! I said any time, I am not joking ..  
Anyway, I visited a local library the other day and found this recipe from book I borrow (ssst.. I tell you secret, I love flip all cooking books - I always amazed by pretty pictures under tag 'food'  hahaha ..  are you with me ?) 
The recipe called 'Chocolate Confetti Chiffon Cake with Almond Crunch' .. whoaaa... that is a long title for the cake, so I baked this cake on my birthday and surprise (or not surprise) this two cookie monsters love the crunch topping on the cake and off course the chocolate confetti inside the cake

So here is the recipe I slightly copy so I won't forget and will make another time for sure


Chocolate Confetti Chiffon Cake with Almond Crunch

For the topping
1 large white egg
1 1/2 cup sliced almonds
2 tbsp granulated sugar

For the cake
1 1/2 cup miniature semi sweet chocolate chips
2 1/4 cup cake flour (all purpose flour, will work too - just shifted 2times)
1 1/2 cup granulated sugar
1 tsp baking powder
1/2 tsp salt
1/2 cup corn or canola oil (vegetable oil, work as well)
7 large eggs, separated
2/3 cup waters
1 tsp vanila extract
1 tsp almond extract (skip if you don't have)
1/4 tsp cream of tar tar (fresh lemon juice can be used as substitute 

For Glaze
1 1/2 cup confectioners sugar
3 - 4 tbsp milk
1/2 tsp almond extract

Prepare the Topping
Heat the oven 325F . Have ready un greased non stick baking sheet
In a medium bowl, whisk the eggs white with fork until foamy, about 30 second. Stir in the nuts until they're evenly coated. Sprinkle sugar over the nuts.  Spread the nuts with wooden spoon onto the baking sheet.  Bake for 5 minute, stir the nuts and bake again for another 5 -8 minutes.  Remove the nuts, immediately stir them .  The nuts will become crispas the cool. Set a side

Make the Cake
Heat the oven to 325 F    Have ready 10inch un greased chiffon pan

In food processor , pulse the chocolate until some of them are finely grated and the rest have formed small crumbs

In a large bowl, shift together flour, 1 cup of sugar, baking powder, salt. Male a well in the center and put in the oil, egg yolks, water, vanila, almond extract. Beat the mixture until smooth and thick.  Fold in the reserved chocolate chips. Set a side

In a large , clean bowl stand mixer, whisk white eggs, cream of tar tar until foamy, add little by little remaining granulated sugar, Beat until soft peaks form

Stir about 1/3 white eggs mixture into yolk batter, gently fold .  Do it until all the mixture comes nicely together .   Bake for about 1hour 15 minutes, depend on your oven (make sure you check with clean skewer)

Invert the pan onto a bottle with narrow neck and cool thoroughly about 1 hour  than remove the cake , slide onto a serving plate

Make the Glaze :
In a small bowl, stir sugar, mil and extract, adding enough milk to make a smooth glaze, set a side 2 tbsp.   Spread the remaining glazed over the top of the cake, you might not used all of it.  Cover the top of cake with prepared almond crunch , drizzle the reserved glazed.  Enjoy


Thursday, November 17, 2016

Matcha Green Tea Chiffon Cake


We love chiffon cake, an easy light cake for middle of the week. With this recipe you can always modify the flavor of cake, this time I just feel like to play with matcha powder.  I purchased matcha powder long ago when I transit to Japan on the way back home after long vacation.  :)  - visit Japan is in my bucket list, someday somehow ... I will visit that country but for now, let's just try matcha chiffon cake ^_^  

Matcha Green Tea Chiffon Cake

Ingredients :
200gr all purpose flour
1 tsp baking powder
2 tbsp matcha green tea
7 yolks
50 ml vegetable oil
200 ml milk / water or coconut milk
7 white eggs
1/2 tsp salt
200 gr granulate sugar
1/2 tsp cream of tar tar


Directions :
Pre-heat oven 350 F

In medium bowl whisk flour, baking powder, yolks, vegetable oil, coconut milk ,to combine, set aside.

In the bowl of a stand mixer fitted with a whisk attachment, Place egg whites in the bowl and whisk on high speed until soft peaks form (they should droop over like soft-serve ice cream), about 30 seconds. Gradually add sugar and continue whisking until stiff peaks form (they should stand straight up), about 1 minute more. Using a rubber spatula, fold a quarter of the egg whites into the batter until evenly incorporated; gently fold in the remaining egg whites until just combined and no large white streaks remain.

  1. Pour the batter into the chiffon pan (no need to coating the pan). Bake until the surface of the cake is golden brown and springs back when pressed and a toothpick or cake tester inserted into the center comes out clean, about 55 minutes. Place on a wire rack , turn the pan upside down to cool slightly, about 15 minutes. Carefully run a knife around the perimeter and turn the cake onto the rack to cool completely.

Sunday, November 13, 2016

Autumn Season ... almost pass


I have so many reason to love Autumn Season , one of the reason that I can find Persimmon fruits almost in every Asian Store everywhere I go.  My husband just like Hachiya Persimmon which take time to be able to eat, must be completely ripened before consumption  When they are ready the fruit is become soft and very sweet ..   But for me, I love both of the type of persimmon, Hachiya and Fuyu.   Fuyu doesn't need to be soft or ripened to be eat, just thin sliced and eat like that.. the taste is so good and crunchy. 

I kept some of hachiya persimmon and wait until very soft to make this delicious Persimmon Cake or I say 'bread' since similar to Banana Bread !!   Don't be surprise with amount of sugar has been used in this recipe, the sugar will produce a moister and sweeter bread  

My daughter loves to eat this bread for breakfast with butter .. even after come back home from school she will ask for more .  I think is ok, since she is helping me alot rake the leaves in the backyard ^_^

The recipe slightly adapted from David Lebovitz 


Persimmon Bread
Two 9-inch (23cm) Loaves
Ingredients :
  • 3 1/2 cups sifted flour
  • 1 1/2 tsp salt
  • 2 tsp baking soda
  • 1 teaspoon ground nutmeg
  • 2 to 2½ cups sugar
  • 1 cup melted unsalted butter and cooled to room temperature
  • 4 large eggs, at room temperature, lightly beaten
  • 2/3 cup Cognac, bourbon or whiskey - I used vanilla 
  • 2 cups persimmon puree (from about 4 squishy-soft Hachiya persimmons)
  • 2 cups walnuts or pecans, toasted and chopped
  • 2 cups raisins, or diced dried fruits (such as apricots, cranberries, or dates)
1. Butter 2 loaf pans. Line the bottoms with a piece of parchment paper or dust with flour and tap out any excess.
2. Preheat oven to 350ºF (180ºC) degrees.
3. Sift the first 5 dry ingredients in a large mixing bowl.
4. Make a well in the center then stir in the butter, eggs, liquor, persimmon puree then the nuts and raisins.
5. Bake 1 hour or until toothpick inserted into the center comes out clean.
Storage: Will keep for about a week, if well-wrapped, at room temperature. The Persimmon Breads take well to being frozen, too.

Modern Maple Quilt


One of an autumn quilt theme that I manage to make this year finally is here , it has been in my bucket list for so long .. just realize how fun block I can make everyday, until my head spin again... should I or should I not do hand quilting ? off course the last choice always win !!   Hand Quilting , off course ...  is like relaxing therapy to me .  There is so many empty (negative) space in this quilt which I happy to add 'maple leaf' hand stitches pattern to add durability to this quilt.

The Quilt finish is 57 x 67 inches which is a perfect size for cuddle - for hand quilting I used a pumpkin color Egyptian Cotton Thread 

Have a wonderful Autumn , friends..


Saturday, October 8, 2016

Torshi Makhloot - Mixed Vegetable Pickle


Our small garden doing well so far, we be able to picked some fresh vegetable in many day, that give me chance to make some pickle during summer time and save for winter.  Some persian pickle that I like is mixed vegetable pickle - well, pretty much use vegetable that you like and the pickle is ready in short time compare to garlic / torshi pickle. 


Torshi Makhloot - Mixed Vegetable Pickle 
Recipe from beloved blogger : Azita - Turmeric & Saffron 


Ingredients:


3 large carrots, washed, peeled, lightly steamed, finely chopped or shredded 
3 medium red or white onions, peeled and finely diced
2 medium eggplant, peeled and diced
2 large cucumbers, peeled and finely chopped
2 green bell peppers, washed, cleaned and diced 
1 small cauliflower, washed, finely chopped
1 small head of celery, washed and finely chopped
1/2 cup shredded white cabbage

1 cup of each of the following herbs: (parsley, coriander, dill), washed, dried and finely chopped
2 tablespoons of the following fresh herbs chopped or dried (tarragon, mint, basil)

2 tablespoons dried lime powder 
2 tablespoons crushed angelica 
2 tablespoons nigella seeds 
2 tablespoon fennel seeds 
2 tablespoons coriander seeds 
6-7 garlic cloves, finely chopped
4-5 tablespoons salt
2 red hot peppers, dried or fresh, chopped
2 teaspoons turmeric powder


5-7 cups white vinegar

Method:
  1. Salt the eggplants and either bake them in a preheated 350 degrees Fahrenheit oven for 25- 30 minutes or cook them with 1/2 cup of vinegar over medium-low heat for 15 minutes. Set aside to cool.
  2. All the herbs and vegetables must be completely dried before mixing them together. Spread out the washed herbs on a table cloth for several hours to dry.
  3. In a large mixing bowl combine all ingredients and mix well.
  4. Using a wooden spoon pack pickles in clean glass jars up to the rim. Press down on them to make more room as you are filling up the jars. Add more vinegar if needed.
  5. Sprinkle a teaspoon of salt into each jar before closing the lid tightly.
  6. Store in a cool dry place for at least 2 weeks before serving.  
Enjoy!

Friday, September 16, 2016

Easy Dish

This what happen when you don't feel well, decide not to cooking for dinner, open the fridge and see nothing there , feel sorry for the two other member of family , and than decide to pull pot ...  confusing, right ??? well that's me ...I think chopping some veggies or presenting a hot warm foods on the table is always in my DNA !!! 


Alright, this is a very simple dish .. that I recommend when you have those kind of situation that I mention above, other than that ... don't bother, just call pizza delivery...and you are done LOL


Catch-Up Chicken
Source : Balaboosta Cook Book by Einat Admony

Ingredients :
1 cup ketchup
1/2 cup apple juice
1 tbsp kosher salt
2 tsp ground cumin
1 tsp hungarian paprika (feel free to substitute with sirracha or other hot pepper)
3 pounds bone-in chicken pieces, skin on
1 medium yellow onion, cut into large chunks
2 tomatoes, cut into wedges

Directions :
Preheat the oven 350 F
Mix together the ketchup, juice, cumin, salt, paprika in a large dutch oven or other heavy pot
Rinse the chicken , pat dry, add into the pot. Add onion, tomatoes, toss together to coat evenly , cover and cook for 45 - 55 minutes, until the juice run clear from a cut between the thigh and leg.

Friyaaay..

It's friday ... is time to doing some little working on pictures that I taken almost entire week, doing some little work on editing pictures that I taken almost everyday - updating my blog - adding recipes , Nothing fancy thou ..

The second fancy fox quilt is on the way to the new owner, a little smart girl who has bright talent on music.. I hope she will enjoy the quilt and happy to read her mom message on the back of the quilt that I personally hand-stitches for her.  I admit, it was take a lot of time making this quilt and tears also, I think just because I am so distracted with something else on my head ..  but I am so happy the quilt is come very nice ...

if you thinking about next quilt for yourself, kid or just for gift away , please don't hesitate to contact me , this day it will take 2-3 weeks before you get on your hand.  :)